Showing posts with label gifts. Show all posts

Monday, December 11, 2017

Christmas Traditions Box: The Legend of Saint Nicholas

8:40 PM 1 Comments
Between my husband and me, we have a lot of European blood running through our veins. One of the things we like to do at Christmastime and other holidays is to research some of the traditions of our ancestors' cultures. We have incorporated Saint Nicholas Day into our Christmas traditions in the past couple of years.

Many European countries celebrate Saint Nicholas on December 6th. For our family, we read Saint Nicholas: The Real Story of the Christmas Legend on December 5th and then on the morning of the 6th our kids are in for a surprise.
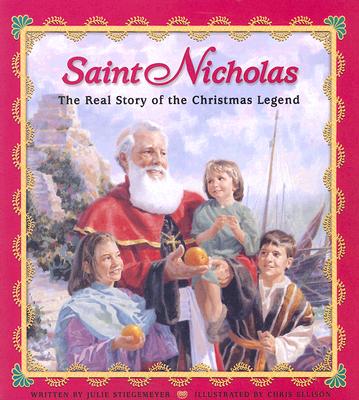
Image result for saint nicholas book

In this story St. Nicholas, who was the pastor of a town, found a little boy crying. St. Nicholas asked why he was crying. The boy explained that his sisters couldn't marry because they couldn't afford a dowry. St. Nicholas encouraged the boy to have faith and reassured him that everything would work out.

That night St. Nicholas went to the home of the boy, quietly opened the shutter of the window and dropped little bags filled with gold onto the floor. In the morning the girls found the gold and were able to be married.


The story explains how St. Nicholas was known as Father Christmas and how his love was shared with those around him. It also talks about how God is even more generous and gave us the best gift of all- the Savior, Jesus Christ.


Our kids leave their shoes out in front of their bedroom door on the night of the 5th. In the morning their shoes are filled with gold chocolate coins for them to enjoy. There is also a bag filled with "gold" $1 coins. They are instructed to use these coins on someone else outside the family whom they can help or cheer up. They are to do this act in secret without being seen or heard like Saint Nicholas. This helps them to be thoughtful and get outside themselves without being praised by the world.

We talk about how we have received many blessings like the girls in the story. But we can also bless other people's lives like Saint Nicholas did. We also talk about the best gift of all- Jesus Christ- and how we can be more like him. He is our perfect example of love, kindness, and service. It gets us into the Christmas spirit.

Tuesday, December 18, 2012

The Gift of English Toffee

11:08 AM 1 Comments

Every year I have to think of something to give to my neighbors and co-workers for Christmas. I always look for something that is cheap, easy to make, doesn't take a lot of time, makes a large amount, and tastes good.

This year we are making English Toffee. It meets ALL my criteria.

ENGLISH TOFFEE

Ingredients:

4 cubes butter
2 cups white sugar
1- 1 1/2 bag milk chocolate chips
3-4 handfuls of chopped nuts (I used pecans)

Directions:

In a medium-sized saucepan, melt butter over medium heat. Once butter is melted, add two cups sugar. Stir constantly for about 12 minutes over medium to medium high heat (about a 7 out of 10 on the heat setting, if you have something like that) or until mixture turns a medium brown (like a nice caramel color). It should be at a low boil most of the time.

Pour hot mixture into a lightly greased jelly roll pan (12 1/2" x 17 1/2"). Spread evenly. Sprinkle chocolate chips on top of hot mixture and let it sit for a minute or two. Lightly spread the melted chocolate, covering the mixture. Sprinkle with chopped nuts and chill in refrigerator until cool.

Once cool, crack into pieces for serving.


Friday, February 3, 2012

Baby Shoes

5:54 AM 2 Comments
It's been all about babies around here lately with my sister and some friends expecting babies real soon. It's time to get some gifts made.


I LOVE baby shoes. I think they're just adorable. I found a couple of cute patterns on Etsy from the Petit Boo shop. The patterns from this shop are very detailed with step-by-step instructions WITH pictures. Each pattern includes a wide range of sizes as well. Check out Petit Boo to make your own super cute baby shoes.


I love how they turned out!

Chalkboard Placemats

5:23 AM 1 Comments


I've been wanting to make chalkboard placemats for months now. I finally did it. I decided that I would follow the directions from Sew 4 Home. However, I wanted to have waterproof fabric on the back instead of regular fabric so I grabbed some oil cloth. When it came time to put the placemat together, I couldn't press anything with an iron or use too many pins. I didn't want to melt my fabric and once the fabric is punctured with pins, the hole stays there.


I decided to do this thing a super basic way using bias tape.


What you'll need:


  • Chalkboard cloth (found in the "utility fabric" section of your fabric store)

  • Oil cloth (also a "utility fabric")

  • Bias tape (extra wide, double fold bias tape- 3 yd. Plan on one package per placemat just in case)

  • Jean needle (strong needle to sew your fabrics)

  • Scissors

  • Sewing machine (with jean needle)

What you'll do:


1) Cut one piece of chalkboard fabric and one piece of oil cloth the same size. Cut it to the size you'd like your placemat to be.


2) With wrong sides together, line up your bias tape on one edge of the chalkboard side! This is important! I found that the chalkboard fabric is quite slick and thick and doesn't grab onto the feed dogs well. So, having the oil cloth on the bottom allows for easier and nicer sewing.


3) Sew your bias tape on. See the following tutorial.


I already finished 2 edges. I'm going to show you the top edge. (Pretend this is your first edge.)


Here's one side of the placemat.


Here's the other side of the placemat.


Here's where the bias tape comes in. For super clear instructions on using bias tape without swearing, watch this video.


I followed the instructions in the video almost exactly. The only change I made was that I lined up the edge of my bias tape with the edge of my fabric. The woman in the video, Amy, lines up her bias tape a little below the edge of the fabric but, don't do it! You need that space when you're using the thicker fabrics.


So, unfold your bias tape, with the thinner edge up. Sew along that first fold. I tucked in my sides like Amy did too.


Start folding your bias tape over to the other side of the placemat.


Now it should look like this on the reverse side.


Sew the edge down. The chalkboard side will be facing down but since you now have the bias tape on the bottom, the feed dogs will grab onto the bias tape nicely and you won't have problems.


Repeat with the remaining sides.


You're done!


Prep your chalkboard by rubbing the edge of your chalk all over the board. Wipe it clean with a clean cloth. You're ready! You can also use liquid chalk which I'd like to try out sometime. It looks a lot cleaner and brighter.


This post was part of The Shady Porch's Rock 'N' Share! Visit The Shady Porch for other great ideas across the blogosphere.

Tuesday, January 31, 2012

Easy Valentine Chocolates

1:27 PM 1 Comments

Looking for a homemade chocolate treat for your Valentine? These chocolate peanut clusters are super delicious AND they take only 3 minutes to make!

Ingredients:

1 bag of Reese's Peanut Butter Chips
1 bag of chocolate chips (use your favorite)
1/2 bag of Heath toffee chips
1/2 can of honey roasted peanuts

Directions:
  1. Pour peanut butter chips and chocolate chips into a microwave-safe bowl. Microwave chips for 1 minute. Stir. Return to microwave for an additional 1 minute.
  2. Remove and stir until smooth.
  3. Add Heath toffee chips and peanuts.
  4. Drop by spoonfuls onto wax paper or parchment paper lined cookie sheet.
  5. Refrigerate until firm.
Place them in truffle papers in a box, or wrap them up in a clear cellophane bag for party favors!

ENJOY!!

I Love You Because... Chalkboard

1:05 PM 3 Comments


This past Christmas I received this cute homemade chalkboard from my sister and her husband. This is one of my favorite gifts. I especially love it around Valentine's Day when I'm thinking of all the reasons why I love my husband (and my kids).

Think of all the reasons you love your "loved one" and let them know! You don't need a fancy chalkboard (though it is super cute) to show your love. Use simple Post-it notes or Valentine Day cards.

What would you write today?


If you would like to make your own board, I can tell you that it is a thin piece of wood spray-painted with chalkboard spray. The border/frame is made also from wood trim. The letters are vinyl. The outcome is cute!

Big Sister, Baby Sister

9:11 AM 1 Comments


One of the greatest machines that I own is my embroidery machine. I love it especially when it comes to personalizing gifts. It makes a world of difference when something is personalized.

This is my third set of shirts I've embroidered recently. This set is for my sister who's expecting her 2nd baby girl in a couple weeks. I can't wait to see my nieces in these!


Tuesday, December 6, 2011

Symbols of Christmas Bag

10:05 AM 1 Comments


Do your kids need a little reminder of the true meaning of Christmas? I sewed and embroidered this bag with one of my favorite Dr. Seuss quotes. Inside the bag I included some symbols of Christmas. I'm excited to keep this bag of symbols and bring it out every year to remind us of Christ.


Here are some of the items I included in the bag.


Christmas tree: points to heaven and reminds us that God is eternal
Candy cane: shaped like a shepherd's staff, Jesus is the true shepherd that brings us into the fold. He cares for us and guides us. The red represents his great sacrifice and white represents purity. We are cleansed through his blood. Its shape is also a J for Jesus.
Star: wise men followed the new star
Presents: God's greatest gift to us is eternal life through his son Jesus Christ
Candle: Jesus is the light of the world
Angel: told the shepherds of the birth of Jesus

You might want to make your own bag or box with the little symbols too.


Dating At Home: Personalized Video From Santa

4:36 AM 0 Comments


This week's dating idea comes from the North Pole...and it's FREE!

We have a 3-year old daughter who loves Santa. For our date, we are going to make her a personalized video from Santa. It's extra easy and cute with Portable North Pole. The video is about 3 minutes long. Santa talks to your child and includes the child's name, age, where the child lives, pictures of the child, facts about the child, and what the child wants for Christmas. Santa then asks his elves to grab the child's file and enter it into the "naughty or nice" machine.

Click HERE to see a sample.


If you don't have children, make one for your spouse! Or maybe a friend. You decide whether the child (or adult) has been "naughty" or "nice."

Click HERE to get started.

Thursday, November 17, 2011

DIY: Gift Bags from Wrapping Paper

8:43 AM 20 Comments


You can make gift bags, treat bags, or lunch bags from any kind of paper. These are especially handy if you're trying to save some cash or have a particular paper design you'd like to use to match a party theme. Here is a step by step guide on how to make your own decorative bag.

It looks a little overwhelming at first but it is really easy. After you do the first one you'll get the hang of it and you'll be able to make bigger bags or smaller bags.

You will need:
  • Scissors
  • Glue or tape (I used invisible gift wrap tape- I'm too impatient to let things dry. Invisible tape works great and looks fine or you can use double sided tape on the inside of the seams for an even cleaner look.)
  • Paper (to make a lunch bag size, cut your paper into a 14"x17" rectangle


TIP: Target sells rolls of wrapping paper in their dollar section every now and then. It already measures 17" in width. You can get a lot of bags out these cheap rolls. (I love Target!)

What you're going to do:

1) Start out with your paper faced down on your table- long sides of the rectangle at the top and bottom, shorter sides on the right and left.


2) Bring the right and left sides together in the middle, overlapping one of the sides slightly (about 1/2"). When your seam is all lined up, press the sides down flat and tape the seam shut.


3) Roll the taped middle seam to the right about 1.5" and press sides down to create a new side seam. Roll the original taped middle seam back to the middle then roll it to the left about 1.5". Now you should have 3 side seams on each side.


4) Push the middle side seams inward and flatten your "bag" down.


5) Now we'll work on the bottom of the bag. Fold the last 2" of the bag upward.


6) From the 2" fold mark, fold the bag up one more inch. (This will be important when you collapse your bag)


7) Unfold the bag and open the bottom to create a rectangle. Push the sides of the rectangle in, as though you were wrapping a gift box without the box. It makes it easier to fold the bottom if you stand the bag upside down with the bottom part up.


(I'm switching over to this white paper because it's a little easier to see how this works.)


8) Line up the seams so you have a crisp base on your bag.


At this point you can collapse your bag down to make it easier to tape (or glue) down.


9) Tape the side with the original middle seam up first.


10) Tape the side with no seam down second.


Open your bag!


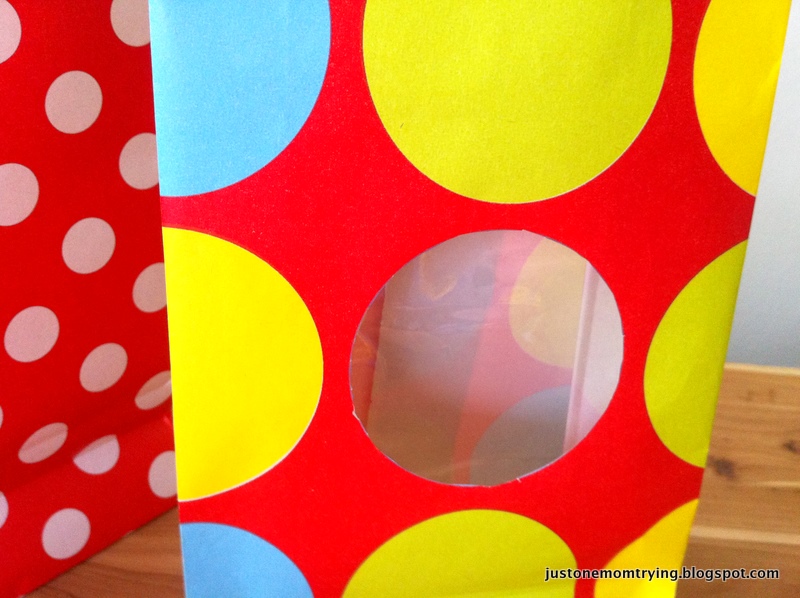
Here's a way you can create "windows" in your treat bags.

I'm using this wrapping paper because it has a circle I can cut out quite easily.


Cut out your window shape and then glue (or tape) cellophane over your window. Proceed to follow steps 1-10 above.


Ta-da!


I love this red and white polka dot paper. Can you imagine how cute it would be for a Minnie Mouse themed birthday party? Or, add a pretty green ribbon for the holidays!

Follow us @justonemomtrying

Instagram

Follow Us