Showing posts with label parties. Show all posts

Saturday, March 24, 2012

DIY: Ribbon Dancers

10:55 AM 2 Comments


My girls love to dance. These ribbon dancers have added a lot of fun to their dance parties. These are great for birthday parties, dance classes, preschool movement, or just for fun. We even "write" our letters with them in the air.

One of the best parts about these ribbon dancers are that they are inexpensive, easy to make, customizable, and don't require tools!!

What you'll need:


Wooden dowel (7/16 x 12 in.)
Screw eye (#14)
Split key ring (1 in.)
1 1/2" wide ribbon (about 10-12 feet long)
Fray Check
Sewing machine OR needle and thread
Acrylic paint (if you want to paint your wooden dowel)


NOTE: I found the dowels (came in a pack of 6) and ribbon at Michael's,
and the screw eyes and key rings at Home Depot.


Twist the screw eye into the top of the dowel.


Twist it in all the way to the base of the eye.


Thread ribbon through the key ring and secure the edge by machine (or hand) sewing it. Add as many ribbons as you'd like.


On the raw edge of the ribbon, use fray check to keep the ribbon from unraveling.


Link the key ring to the screw eye.


DONE! Time to dance!


This post was part of The Shady Porch Rock N' Share and Oopsey Daisy's Wednesday's Wowzers. For more super cute creativity across the blogosphere, head over to The Shady Porch and Oopsey Daisy

Tuesday, January 31, 2012

Easy Valentine Chocolates

1:27 PM 1 Comments

Looking for a homemade chocolate treat for your Valentine? These chocolate peanut clusters are super delicious AND they take only 3 minutes to make!

Ingredients:

1 bag of Reese's Peanut Butter Chips
1 bag of chocolate chips (use your favorite)
1/2 bag of Heath toffee chips
1/2 can of honey roasted peanuts

Directions:
  1. Pour peanut butter chips and chocolate chips into a microwave-safe bowl. Microwave chips for 1 minute. Stir. Return to microwave for an additional 1 minute.
  2. Remove and stir until smooth.
  3. Add Heath toffee chips and peanuts.
  4. Drop by spoonfuls onto wax paper or parchment paper lined cookie sheet.
  5. Refrigerate until firm.
Place them in truffle papers in a box, or wrap them up in a clear cellophane bag for party favors!

ENJOY!!

Monday, January 30, 2012

Baby Shower Game: Guess the Powder

9:36 AM 3 Comments


There are a lot of baby shower games out there. One of my favorites that is really easy to put together but is challenging if you're playing is "Guess the Powder."

Object of the game: Identify as many household powders as you can.

Set up: Fill 10 small, empty baby food jars with household powders such as baking soda, baking powder, corn starch, powdered sugar, cream of tartar, flour, laundry/dish detergent, powdered milk, baby powder, baby formula, etc. Number the jars 1-10. Make sure you make a key to check answers.

Pass out a pencil and paper to each player. Have them number their papers 1-10 or print out a game card here!


Playing the game: Players pass the jars around and write their guess on their paper. The number of the jar coordinates with the number on their paper.

Levels of difficulty:
You can make this game difficult by having the players only LOOK at the powder through the jar.
Make it moderate by letting the players open the jar and smell and/or touch the powder.
Make it really easy by letting the players taste the powder, though I don't recommend it.

Winner: The one with the most correct answers.

Donut Hole Topiary Tips

8:23 AM 3 Comments


I've been finding some very cute ideas on Pinterest. I LOVE the donut topiary idea. I decided to give the topiary a try for a baby shower brunch. It turned out okay but there are some tips that I'd like to share if you decide to try it out. There are some things I would do differently.

#1: Instead of wrapping your styrofoam cone in wax paper, choose a nice wrapping paper that matches the theme. Then, when people start picking the donuts off there will be a cute cone underneath and not a dumb ol' white cone.


wrapping paper vs. wax paper


#2 Stick the toothpicks in one at a time and put the donut on right after the pick is in. Stick the toothpicks closer together. You will feel like you are squishing them in but it looks so much better. Donuts are pretty forgiving so adjust the donut if you need to so that there aren't a lot of gaps.

non-squishing vs. squishing a little


#3: Instead of putting a donut on the very top, put some kind of decoration on the very top. Maybe a cake topper, or some ribbon streamers, or a flower. Also, if there are some little gaps that you don't like, try putting some tiny silk flowers in the gaps.


Donut on top vs. something cute on the top


My next topiary will be darn cute!

This post was part of The Shady Porch Rock N' Share. For other fantastic posts and ideas from the blogosphere, check out The Shady Porch!

Thursday, January 19, 2012

Ruffled Streamers!

8:19 AM 1 Comments


I'm throwing my one-year old a birthday party and hosting a baby shower for a friend this week. I'm cutting my costs by making my own decorations.

You've probably seen the cute ruffled streamers on Pinterest. There are 2 pins in particular. One is a difficult version and the other is an easy version. It was time to try it out.

I went to the MADE blog for the easy tutorial.

I followed the directions and set my sewing machine at 5.0 for the length of my stitches and turned up the tension to strong. I also put my streamers on a wooden dowel to keep my streamers from getting all tangled and twisted. IT WORKED GREAT!!!! It started ruffling on its own!


After I was done ruffling, I rolled my new streamers up nicely to store them until the party!


They just look so pretty. I'm totally reusing these for Valentine's day!


A COUPLE OF THINGS TO CONSIDER:
  • If you are using a wooden dowel (which I suggest you do) make sure that your roll of streamers are about the same size. I tried using a small roll and a large roll on the same dowel, not thinking, and had a little tangled mess on the dowel.
  • The smaller the circumference of the dowel, the better. I found it a little difficult to slide the dowel through some of the tighter-wound rolls of streamers.
  • Decide ahead of time how long you want your streamers. Since you are sewing, once you cut the thread, the stitches will begin to fall out unless you begin and end your stitches with a back stitch. If you decide your streamers are too long and you want to cut them, one way to get around this problem is to tape off the the threads where you want to cut with some clear tape. Then cut down the middle of the tape so that the threads stay taped down and the stitches don't begin to unravel.

Thursday, November 17, 2011

DIY: Gift Bags from Wrapping Paper

8:43 AM 20 Comments


You can make gift bags, treat bags, or lunch bags from any kind of paper. These are especially handy if you're trying to save some cash or have a particular paper design you'd like to use to match a party theme. Here is a step by step guide on how to make your own decorative bag.

It looks a little overwhelming at first but it is really easy. After you do the first one you'll get the hang of it and you'll be able to make bigger bags or smaller bags.

You will need:
  • Scissors
  • Glue or tape (I used invisible gift wrap tape- I'm too impatient to let things dry. Invisible tape works great and looks fine or you can use double sided tape on the inside of the seams for an even cleaner look.)
  • Paper (to make a lunch bag size, cut your paper into a 14"x17" rectangle


TIP: Target sells rolls of wrapping paper in their dollar section every now and then. It already measures 17" in width. You can get a lot of bags out these cheap rolls. (I love Target!)

What you're going to do:

1) Start out with your paper faced down on your table- long sides of the rectangle at the top and bottom, shorter sides on the right and left.


2) Bring the right and left sides together in the middle, overlapping one of the sides slightly (about 1/2"). When your seam is all lined up, press the sides down flat and tape the seam shut.


3) Roll the taped middle seam to the right about 1.5" and press sides down to create a new side seam. Roll the original taped middle seam back to the middle then roll it to the left about 1.5". Now you should have 3 side seams on each side.


4) Push the middle side seams inward and flatten your "bag" down.


5) Now we'll work on the bottom of the bag. Fold the last 2" of the bag upward.


6) From the 2" fold mark, fold the bag up one more inch. (This will be important when you collapse your bag)


7) Unfold the bag and open the bottom to create a rectangle. Push the sides of the rectangle in, as though you were wrapping a gift box without the box. It makes it easier to fold the bottom if you stand the bag upside down with the bottom part up.


(I'm switching over to this white paper because it's a little easier to see how this works.)


8) Line up the seams so you have a crisp base on your bag.


At this point you can collapse your bag down to make it easier to tape (or glue) down.


9) Tape the side with the original middle seam up first.


10) Tape the side with no seam down second.


Open your bag!


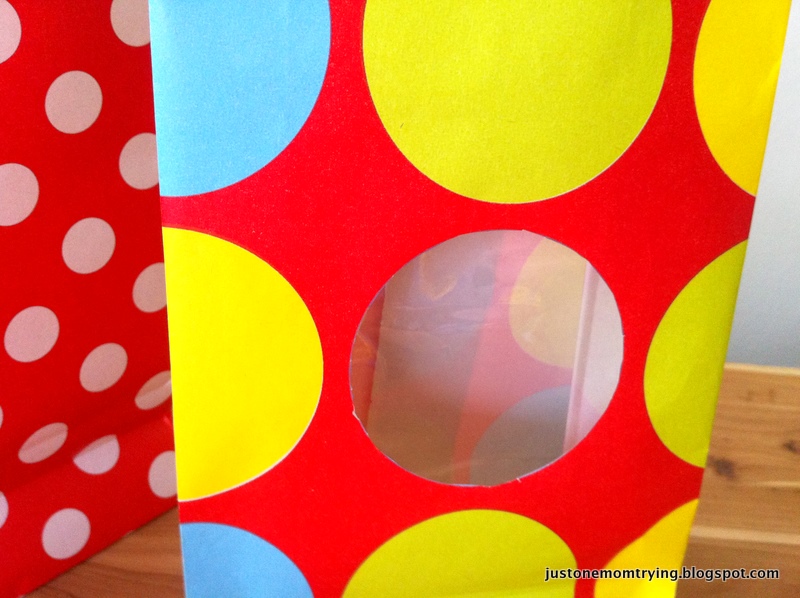
Here's a way you can create "windows" in your treat bags.

I'm using this wrapping paper because it has a circle I can cut out quite easily.


Cut out your window shape and then glue (or tape) cellophane over your window. Proceed to follow steps 1-10 above.


Ta-da!


I love this red and white polka dot paper. Can you imagine how cute it would be for a Minnie Mouse themed birthday party? Or, add a pretty green ribbon for the holidays!

Follow us @justonemomtrying

Instagram

Follow Us